
Recently I moved my blog from Scriptogram to static site generated by Jekyll and hosted on Amazon S3. I am a big fan of Vagrant and I really like the way it keeps clean separation between various development environments without affecting host operating system. This post will explain how you can set-up a Vagrant instance for Jekyll based blogging supported by S3 hosting.
Vagrantfile
In my last post I have already described how to setup Vagrant on your machine. You can use following Vagrantfile configuration for running your vagrant instance using vagrant up (assumes precise64 base box is already installed). Place this Vagrantfile in your Blogs folder.
# -*- mode: ruby -*-
# vi: set ft=ruby :

# Vagrantfile API/syntax version. Don't touch unless you know what you're doing!
VAGRANTFILE_API_VERSION = "2"

Vagrant.configure(VAGRANTFILE_API_VERSION) do |config|
  # All Vagrant configuration is done here. The most common configuration
  # options are documented and commented below. For a complete reference,
  # please see the online documentation at vagrantup.com.

  # Every Vagrant virtual environment requires a box to build off of.
  # We have already installed base box precise64 by running following
  # vagrant box add precise64 http://files.vagrantup.com/precise64.box
  config.vm.box = "precise64"

  # Create a forwarded port mapping which allows access to a specific port
  # within the machine from a port on the host machine. In the example below,
  # accessing "localhost:4000" will access port 4000 on the guest machine.
  config.vm.network :forwarded_port, guest: 4000, host: 4000

  # Create a private network, which allows host-only access to the machine
  # using a specific IP.
  config.vm.network :private_network, ip: "33.33.33.10"

  # Share an additional folder to the guest VM. The first argument is
  # the path on the host to the actual folder. The second argument is
  # the path on the guest to mount the folder. And the optional third
  # argument is a set of non-required options.
  config.vm.synced_folder ".", "/vagrant", nfs: true

  # Enable provisioning with Puppet stand alone.  Puppet manifests
  # are contained in a directory path relative to this Vagrantfile.
  # You will need to create the manifests directory and a manifest in
  # the file precise64.pp in the manifests_path directory.
  config.vm.provision "puppet" do |puppet|
    puppet.options        = "--verbose --debug"
    puppet.manifests_path = "../Manifests"
    puppet.module_path    = "../Modules"
    puppet.manifest_file  = "blog_site.pp"
  end
end
Puppet Provisioner
Vagrantfile requires Puppet modules and manifests to set-up the Jekyll. Both Puppet Modules and Manifests are available at same level as Blogs.
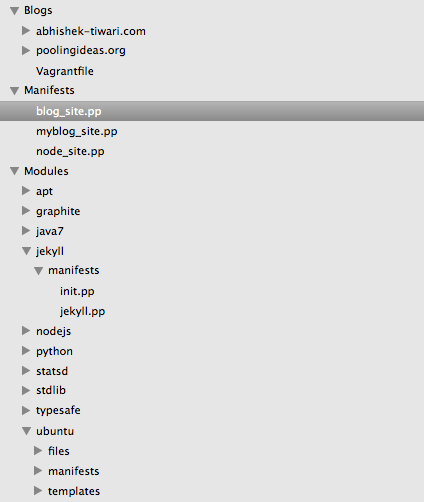
Your manifest file blog_site.pp will look like ,
include ubuntu::apt
include ubuntu::bashrc
include ubuntu::basic
include jekyll::jekyll
class { 'ubuntu::s3cmd':
	my_access_key => 'YOUR-AC-KEY',
	my_secret_key => 'YOUR-SE-KEY',
}

Class[ubuntu::apt] -> Class[ubuntu::bashrc] -> Class[ubuntu::basic] -> Class[ubuntu::s3cmd] -> Class[jekyll::jekyll]

# Set default path for Exec calls
Exec {
    path => [ '/bin/', '/sbin/' , '/usr/bin/', '/usr/sbin/', '/usr/local/sbin/', '/usr/local/bin' ]
}
In blog_site.pp we include,
Apt
ubuntu::apt for running apt related commands mainly updating the apt-get,
class ubuntu::apt {
	# Downloads the package lists from the repositories and "updates" them
	exec { "apt-update":
		command => "sudo apt-get update"
	}
}
Bashrc
ubuntu::bashrc for creating .bashrc profile for vagrant user to setup default ssh folder as shared folder
class ubuntu::bashrc ($owner ='vagrant', $group = 'vagrant', $shared_folder='/vagrant') {
	# resources
	if $owner == 'root' {
		$uhome = "/${owner}"
	}
	else {
		$uhome = "/home/${owner}"
	}
	file {"${uhome}/.bashrc":
		ensure  => present,
		owner   => $owner,
		group   => $group,
		mode    => '0644',
		# content or source or target
		content => template('ubuntu/bashrc.erb'),
	}
}
Above requires .bashrc.erb template
#.bashrc

#Source global definitions
if [ -f /etc/bashrc ]; then
	    . /etc/bashrc
fi

cd /<%= shared_folder %>
Essentials
This will make sure build-essential is available,
class ubuntu::basic {
	# Install build essential
	package { "build-essential":
		ensure => present,
	}
}
Jekyll
Installing Jekyll and required dependencies,
class jekyll::jekyll {
	# resources
	package { "rubygems":
		ensure => present,
	}
	package { "ruby1.9.1-dev":
		ensure => present,
	}
	package { "ruby1.8-dev":
		ensure => present,
	}
	package {'jekyll':
		ensure     => latest,
		provider   => 'gem',
		require    => Package['rubygems', 'ruby1.8-dev', 'ruby1.9.1-dev', 'build-essential'],
	}
	package { "activesupport":
		ensure   => '3.1.0',
		provider => 'gem',
		require  => Package['jekyll'],
	}
	package { "kramdown":
		ensure   => present,
		provider => 'gem',
		require  => Package['jekyll'],
	}
	package { "thor":
		ensure   => present,
		provider => 'gem',
		require  => Package['activesupport']
	}
}
s3cmd
s3cmd is used to sync the static site generated by Jekyll and stored in _site folder.
class ubuntu::s3cmd ($my_access_key, $my_secret_key, $owner ='vagrant') {
	# resources
	package { "s3cmd":
		ensure => present,
	}
	# resources
	if $owner == 'root' {
		$uhome = "/${owner}"
	}
	else {
		$uhome = "/home/${owner}"
	}
	file {"${uhome}/.s3cfg":
		ensure  => present,
		owner   => $owner,
		group   => $group,
		mode    => '0644',
		# content or source or target
		content => template('ubuntu/s3cfg.erb'),
	}
}
s3cmd will require AWS API access key and secret key with sufficient access privilege to add, remove and update files in your S3 bucket. Access key and secret key should be provided as parameter value when declaring ubuntu::s3cmd class in blog_site.pp.
Setting Up Amazon S3 Bucket And Root Domain
You can use this guide for setting up a S3 bucket with name your-domain.com for hosting your Jekyll generated static blog content and mapping your root domain to the bucket. This requires switching to Amazon Route 53 as your DNS Provider.
Building Your Jekyll Site
Once Jekyll setup is ready you can create your own Jekyll site and content. You can do this by cloning an existing Jekyll site or build one from scratch.
Sync Jekyll Generated Content To S3 Bucket
Once blog content is generated using jekyll --server, you can upload content of _site directory to your S3 bucket your-domain.com using,
s3cmd sync _site/ s3://your-domain.com
s3cmd sync --delete-removed _site/ s3://your-domain.com --verbose
And that's all. We are now blogging like hacker.